USB Charger Spy Camera Instructions
Here's a quick rundown of the initial setup steps:
- Plug in the Device
- Memory Card Installation
- Download the Companion App
- Record Mode Selection
- Start Recording
- Data Extraction
In the following sections, we'll walk through each of these steps in detail, providing useful tips to ensure the optimal functionality of your Spy Camera. Stay tuned and learn how to deploy this versatile surveillance tool to its full potential.
Note: These are general instructions that work with most models but won't work with some, if you have more issues we recommend looking for your specific model online.
Initial Set-Up and Installation

Connecting to Power Supply
Firstly let me guide you through the initial setup and installation process.
Firstly, you'll want to connect your USB charger spy camera to a power supply. Simply plug the device into a wall outlet, just like you would with any other USB charger.

You'll notice an indicator light on the device, which lets you know it's connected and receiving power. Remember that the indicator light might vary depending on your model.
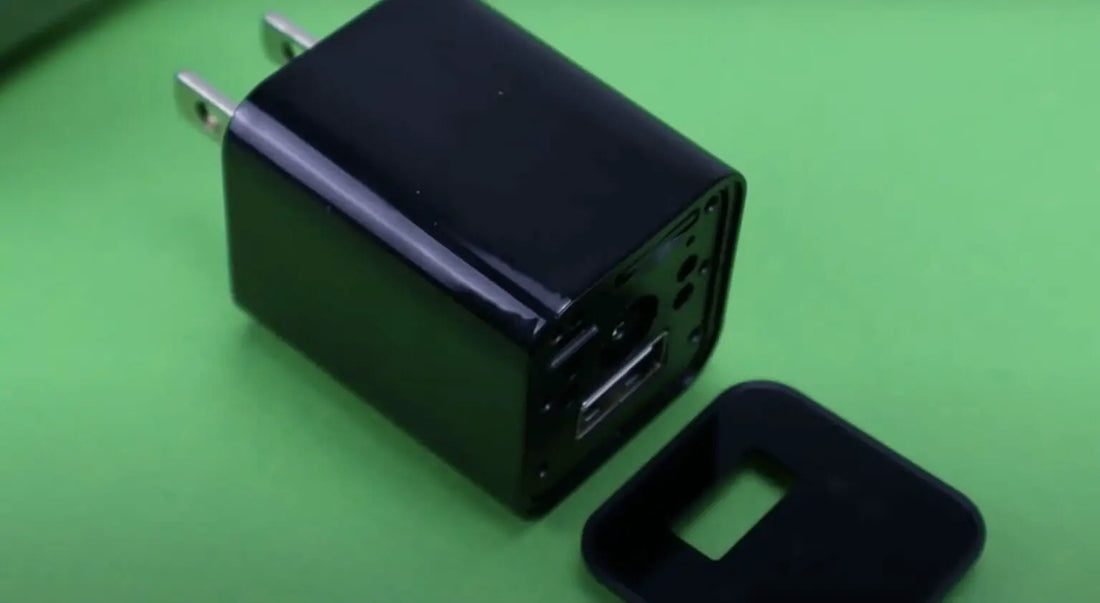
Inserting a Micro SD Card

For storage purposes, insert a Micro SD card into the SD card slot on the USB charger spy camera. Here's what to do:
- Carefully examined the device to locate the Micro SD card slot.
- Made sure the Micro SD card was properly aligned and gently slid it into the slot until it clicked into place.
- Double-checked the card was securely seated by giving it a light press.
Using the Mobile App
Connecting to Wi-Fi
Connecting your USB charger spy camera to Wi-Fi is simple. First, download the mobile app compatible with your camera.

Once the app is installed, open it and connect the camera to Wi-Fi. Here's how to do it:
- Turn on the camera by plugging it into an outlet.
- Open the app and sign up or log in if you already have an account.
- Press the "+" icon to add your camera.
- Choose your camera model from the app's list.
- Enter your Wi-Fi network's name and password.
- Wait for the app to connect your camera to the network.
Viewing Live Footage

After connecting to Wi-Fi, you may want to see what your camera captures. Here's how to view the live footage:
- Open your app.
- Tap on the camera icon or camera name to access the live feed.
- Wait for the live stream to load.
Adjusting Camera Settings

The app will also allow you to fine-tune your camera settings. From adjusting the resolution to enabling motion detection, here's how to do it:
- Open the app and select your camera.
- Look for a settings icon (usually a gear) and tap on it.
- Browse the available settings and adjust them to your liking.
- Save any changes you made.
And that's it! Using the mobile app with a USB charger spy camera is a piece of cake, whether connecting to Wi-Fi, viewing live footage, or adjusting camera settings. With a well-designed app and a few simple steps, you'll have a spy camera up and running quickly.
Recording Features and Options
Motion Detection

Motion detection is a fantastic option; you must save storage space and record only when something happens.
To set up motion detection:
- Make sure your MicroSD card is inserted into the camera.
- Switch from continuous recording to motion detection mode, usually found in the app's settings, usually found under a gear icon.
- Place the USB charger spy camera strategically to cover the area you want to monitor.
- Once motion is detected, the camera will start recording automatically.
The motion detection feature efficiently captures important moments without wasting storage on hours of empty footage.
Night Vision
Another incredible feature of the USB charger spy camera is its night vision capabilities. You'll find it super helpful when monitoring a dim or dark environment.
Setting up night vision:
- Check if your camera has built-in night vision by referring to the product manual.
- If the night vision feature is available, ensure it's enabled in the settings, usually found under a gear icon.
- Position the camera in a location with minimal lighting.
- The camera should automatically activate its night vision mode when the light levels decrease.
With night vision enabled, you can be confident that your camera will continue to capture clear and detailed footage even in low-light situations.
Loop Recording
The last feature I want to highlight is loop recording. Thanks to this, you'll never have to worry about running out of storage on your MicroSD card.
To set up loop recording:
- Navigate to the camera's settings menu to locate the loop recording option.
- Enable the loop recording feature.
- Choose the desired duration of each video segment (e.g., 1 minute, 5 minutes, or 10 minutes).
- Once the MicroSD card is full, the camera will automatically overwrite the oldest footage and continue recording.
Loop recording ensures you always have the most recent footage available, even when your MicroSD card reaches capacity.
Hidden Features and Tips
| Hidden Feature/Tips | Description and Steps to Access |
|---|---|
| Sound Activated Recording | If available, activate under settings. Useful for capturing conversations or sound-triggered events. |
| Time Stamp Customization | You can usually adjust time stamps on the footage. Go to settings, select 'Time & Date; adjust as needed. |
| High Definition Mode | If available, switch to HD mode for better video quality in settings. Use it when fine detail is important. |
| Power Saving Mode | In some models, a power saving or standby mode might be available to prolong battery life. Activate it when the camera is not in use. |
| Adjusting the Viewing Angle | Some models may allow adjusting the viewing angle for better coverage. Check in your camera settings or manual for this feature. |
Note: Not all features will be available on all models, and exact instructions may vary. Always refer to the specific product manual or support for exact instructions.
Reviewing and Exporting Footage
Accessing Footage on Your Computer

First, ensure you have a micro SD card inserted in the device, as it stores all the recorded videos. Then, unplug the charger camera and remove the micro SD card.
Now, on to your computer:
- Insert the micro SD card into the card reader.
- Open the File Explorer or Finder (depending on your operating system).
- Locate the Removable Disk or SD Card and click on it to open.
- You'll typically find a folder called DCIM or CAMERA; double-click on it.
- You'll find your video files inside the folder and can now access them.
Ah, there they are! Now, all my recorded footages are accessible on my computer for review and export.
Playback Options

When it comes to playing back the videos, I've found a couple of ways to do it right. Let me share them with you:
Media Players: Most of the time, I use a media player software like VLC or Windows Media Player. They're pretty straightforward and can easily handle the video formats from my USB charger spy camera.
Built-in Media Players: Sometimes, I just double-click on the video files in the external storage folder. The default media player on my computer (be it Windows or Mac) takes care of the playback.
That's basically it! Reviewing and exporting footage from a USB charger spy camera is pretty simple, especially if you follow these steps. Just make sure your micro SD card is properly placed, and you're good to go.
References
Books:
- "The Complete Guide to Home Security Systems" by Danny Briere, Pat Hurley.
- "Spy Secrets That Can Save Your Life" by Jason Hanson
Websites:
- Reddit: r/hiddencameras. https://www.reddit.com/r/hiddencameras/
- Quora Forum. https://www.quora.com/How-do-spy-cameras-work
Video References
Greg Toope
Peter von Panda
WATADEEEL